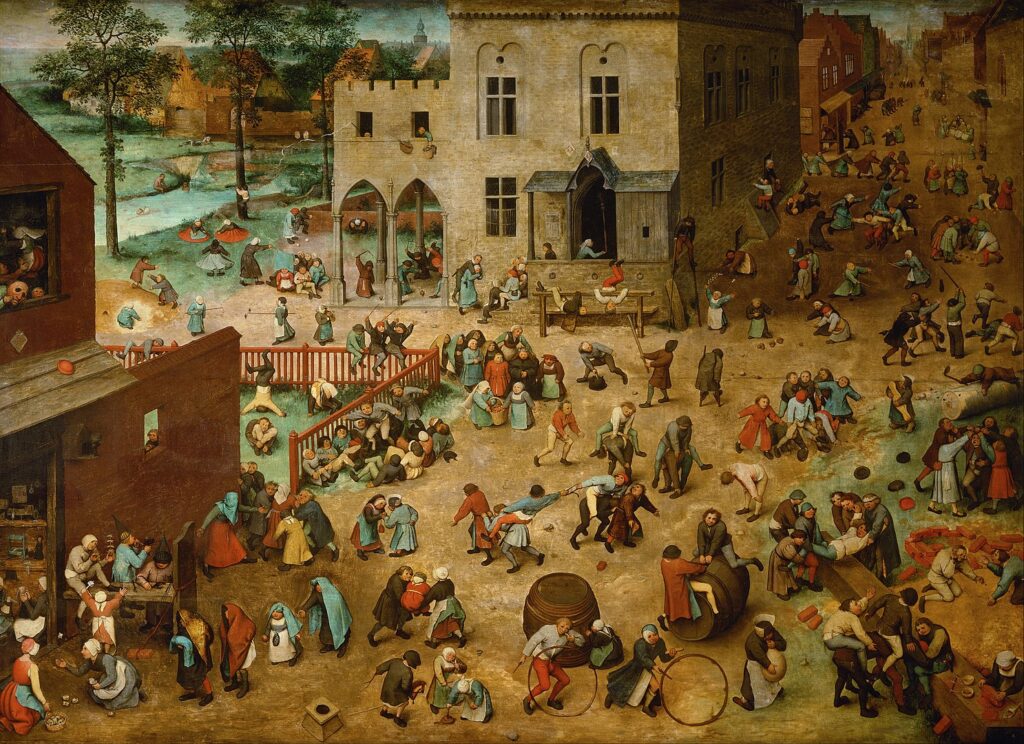
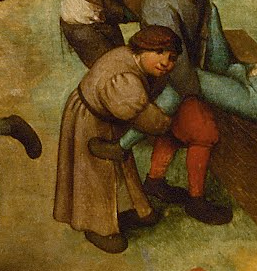
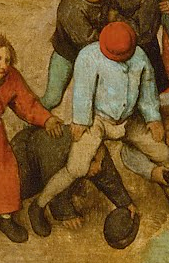
BRUEGEL, Pieter the Elder. Children´s games
The inspiration comes from my favorite painting, "Children's Games" by Pieter Bruegel the Elder, painted in 1560, which depicts a number of bonnets on children's heads, see a few details below.
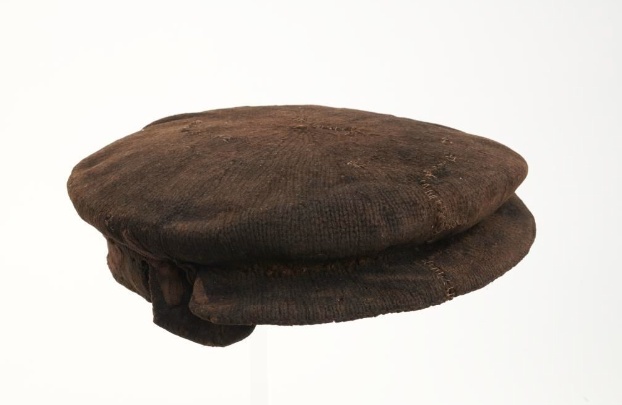
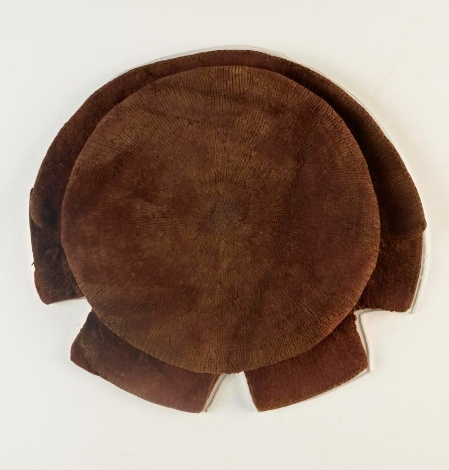
Another preserved cap, split-brimmed with slashed neckflap. Workers digging foundations for new buildings around London in the early 20th century found many pieces of clothing and textiles buried in the ground. Many of them are caps like these, most of which are in good condition. They were probably lost from the heads of their wearers or discarded when they became unfashionable (around 1570) and thrown into city ditches and cesspools. Unfortunately, as these were not formal archaeological excavations, all details that could help to date the caps more accurately were lost.
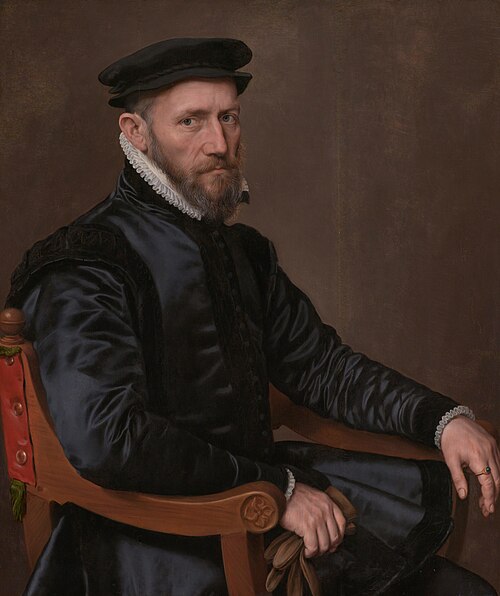
MOR, Antonis. Portraits of Sir Thomas Gresham and Anne Fernely
Sir Thomas Gresham (1519–1579) wearing a cap.
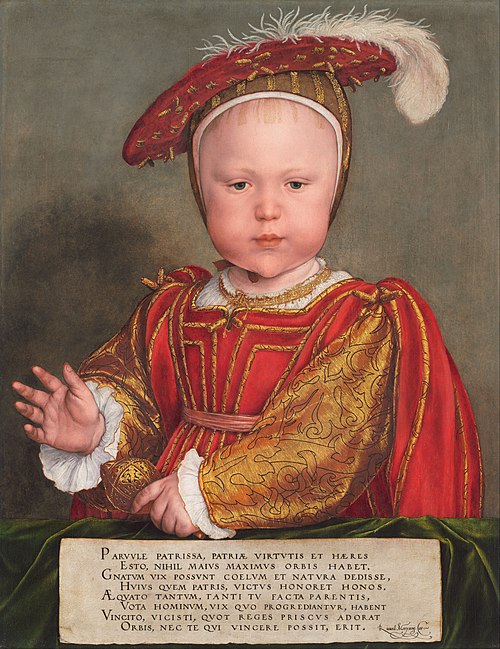
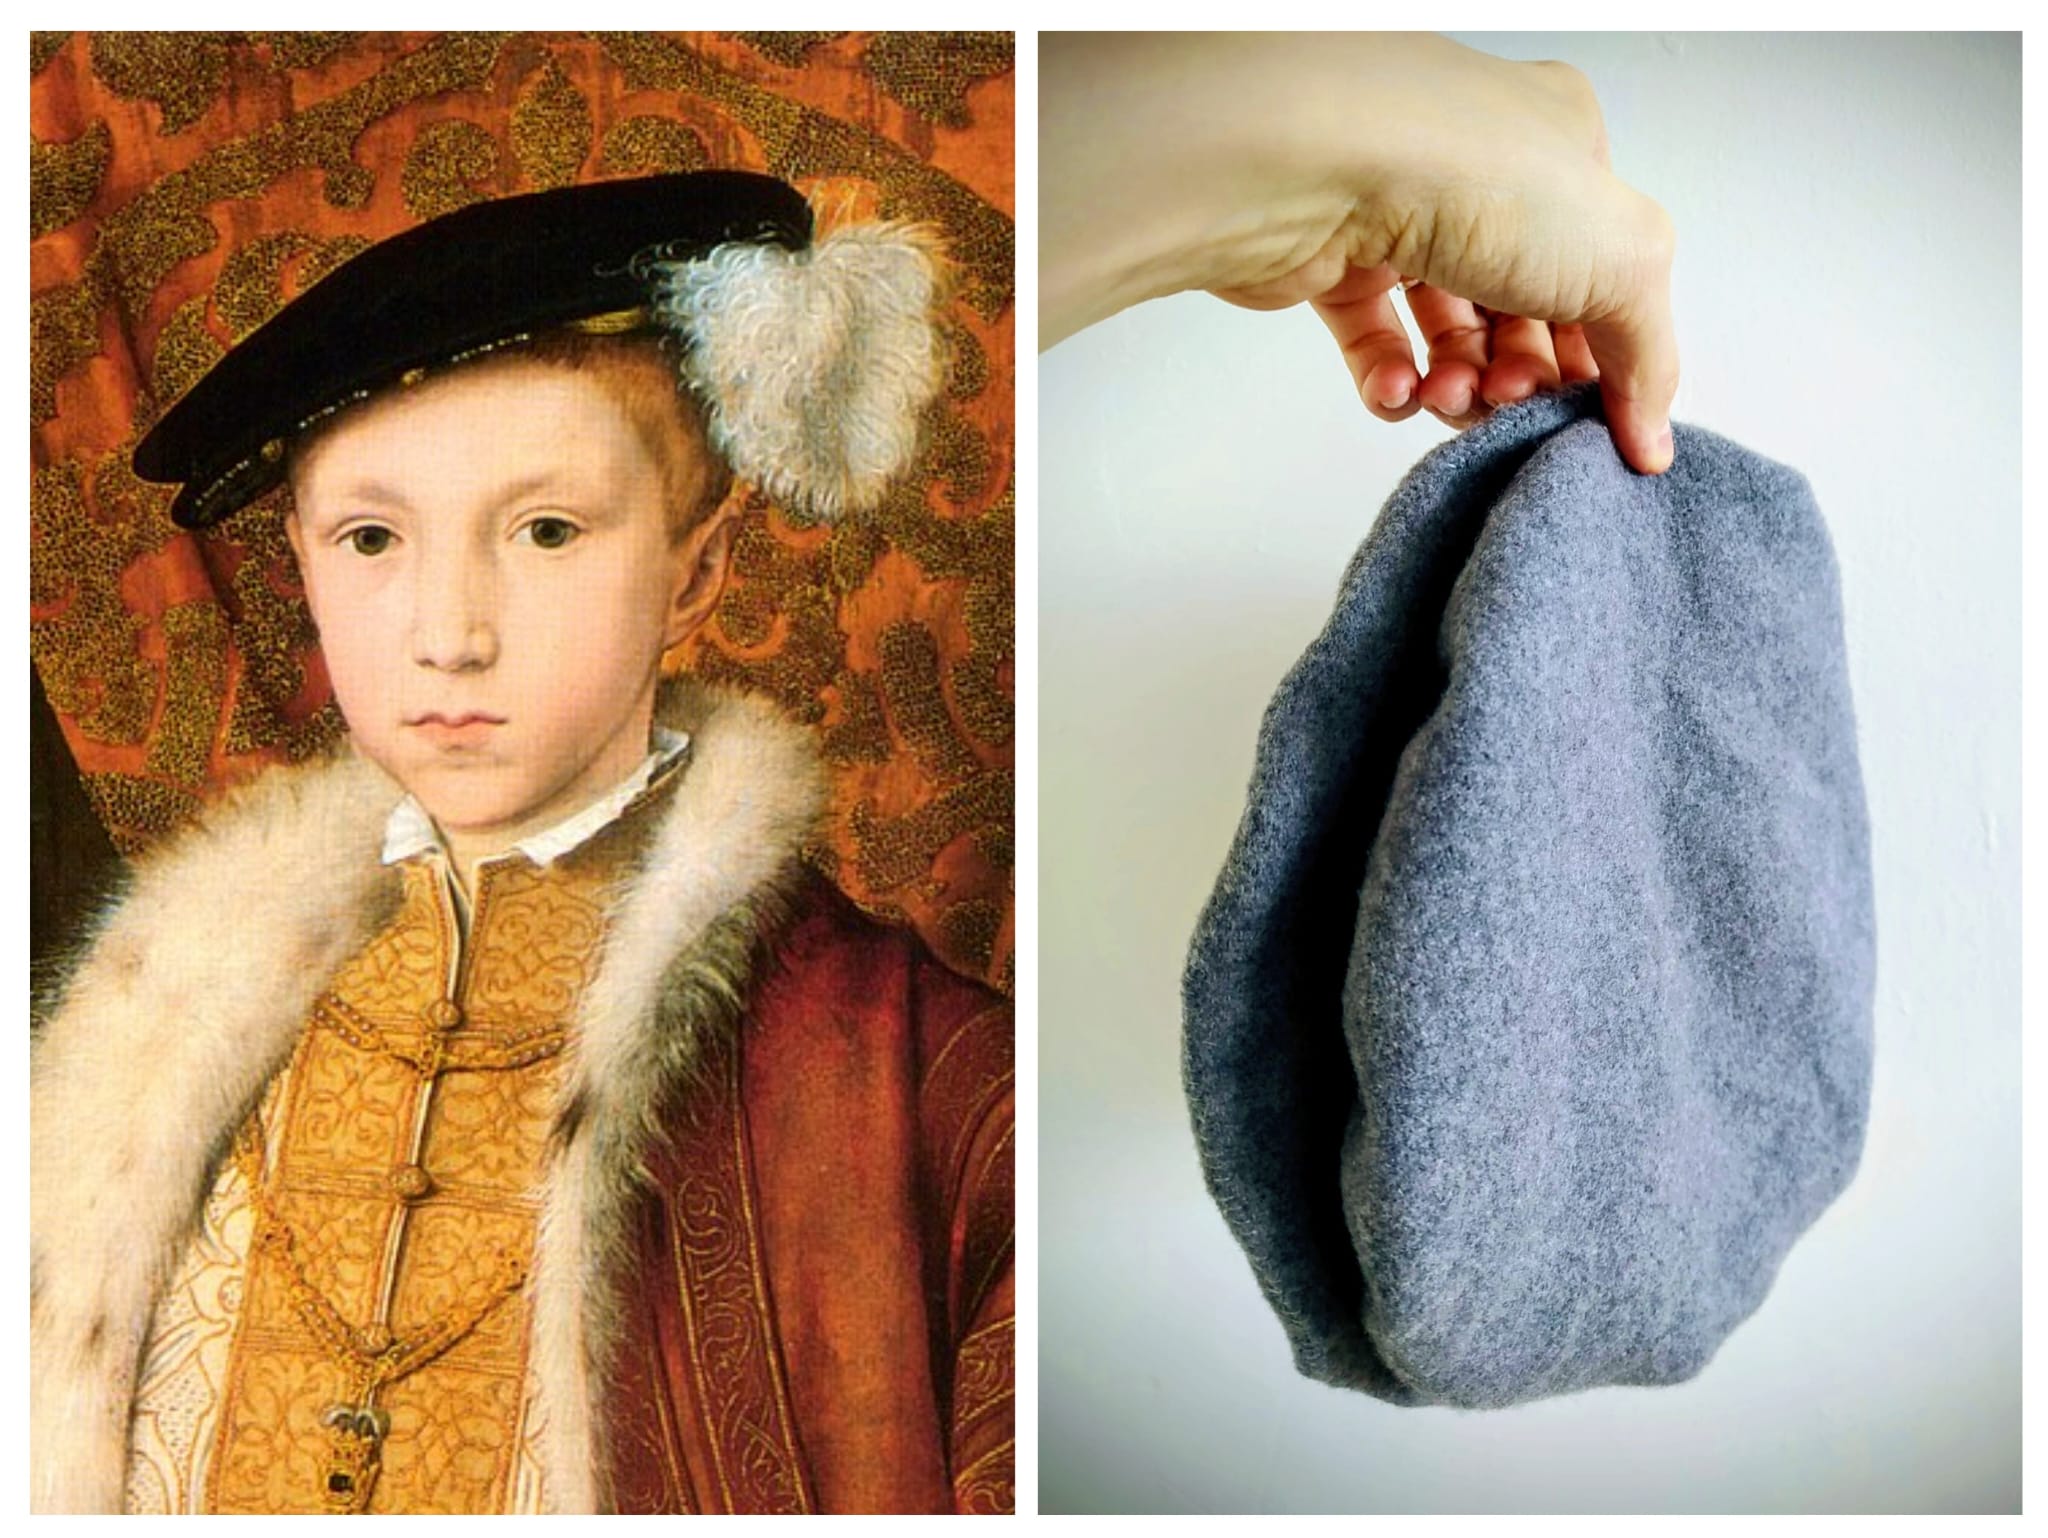
HOLBEIN, Hans the Younger. Edward VI as a Child
Another portrait of Prince Edward, also wearing a cap.
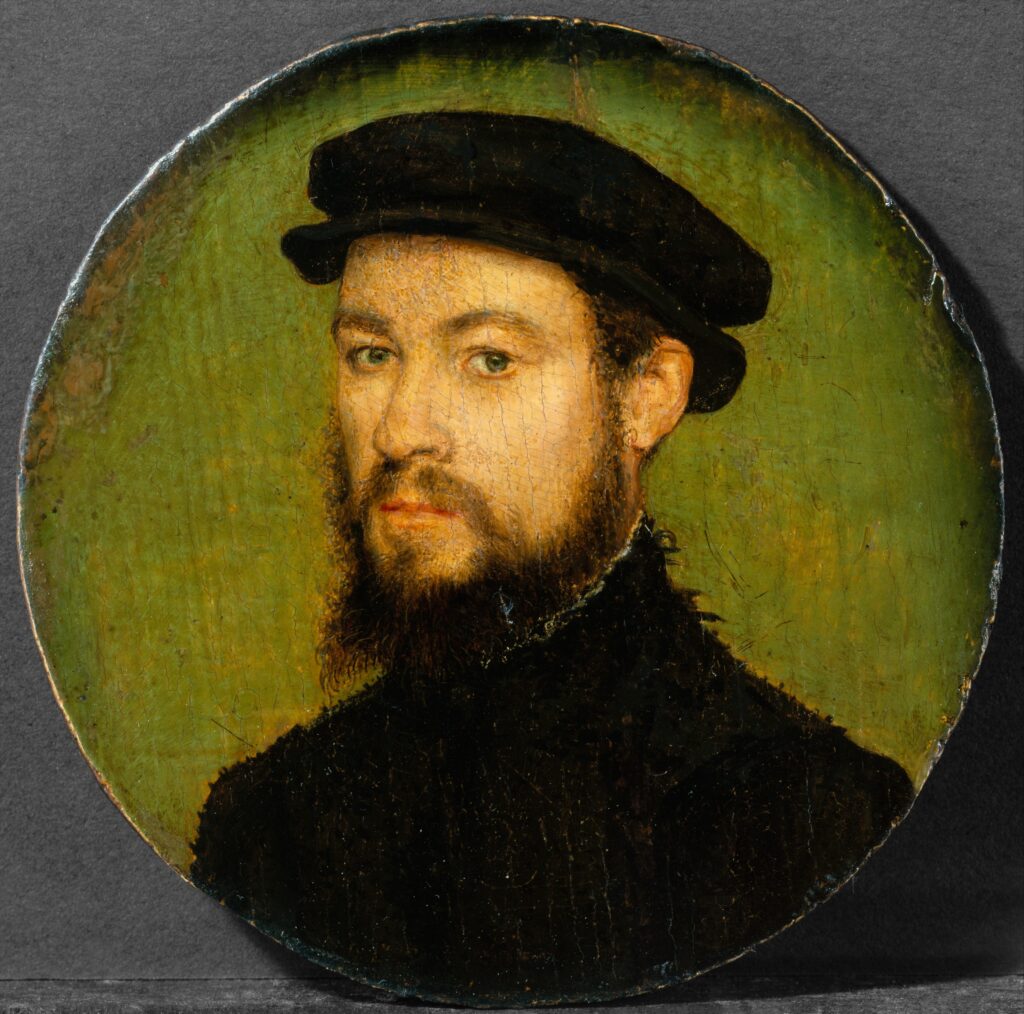
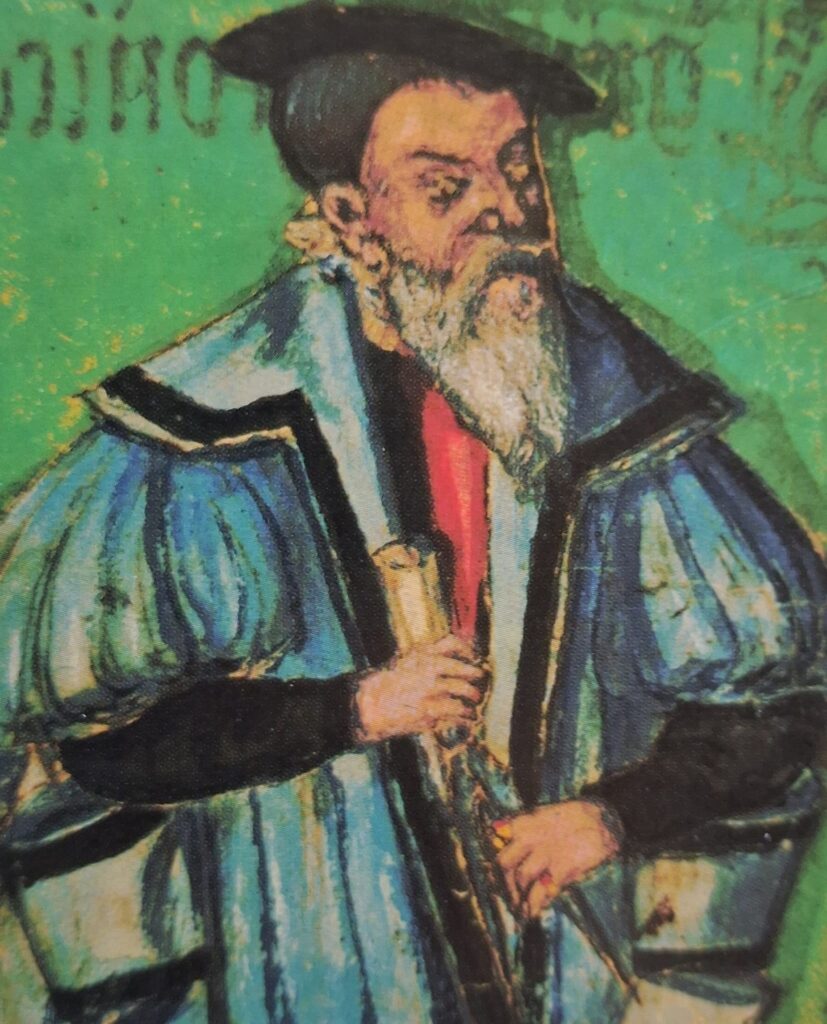
LYON, de Corneille. Portrait of a Man
This portrait shows a simple, single-color version of the bonnet. According to museum descriptions, these caps were sometimes also referred to as "apprentice" or "statute" caps. In 1571, a law was passed requiring every man over the age of six, with the exception of men of high rank, to wear a knitted woolen cap made in England on Sundays and holidays.

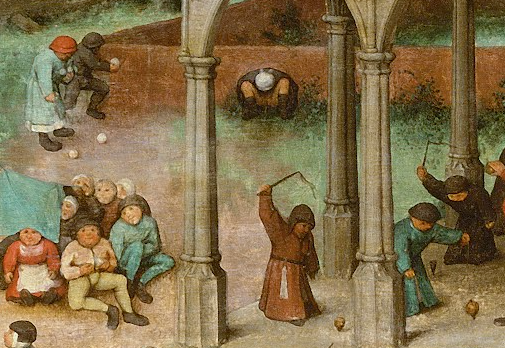
BRUEGEL, Pieter. Peasant Wedding
We can find lots of bonnets in other Bruegel paintings too. Museums say that some of them were trimmed with ribbons to look like the pricier silk versions. Wealthy Londoners wore headgear influenced by European fashion, and bonnets from Milan, decorated with ostrich feathers and brooches, were particularly fashionable. The painting depicts villagers (detail).
HASELBACH, Pankraz engelhard von. Chebská kronika
One domestic flat cap belonging to Bernhardin Schmidl, mayor of Cheb, photo taken from the publication Clothing in Western Bohemia in the 15th to 17th Centuries by Veronika Pilná (p. 45). In her publication, the author states that the large flat bonnet was a popular head covering for both men and women in the first half of the 16th century. It was worn on a hair net and tilted to one side, decorated with jewels and feathers. It quickly became popular among broad sections of the population, from nobility and townspeople to soldiers and mercenaries (p. 51). At the end of the 16th century, bonnets were replaced by completely different types of headgear in Bohemia.
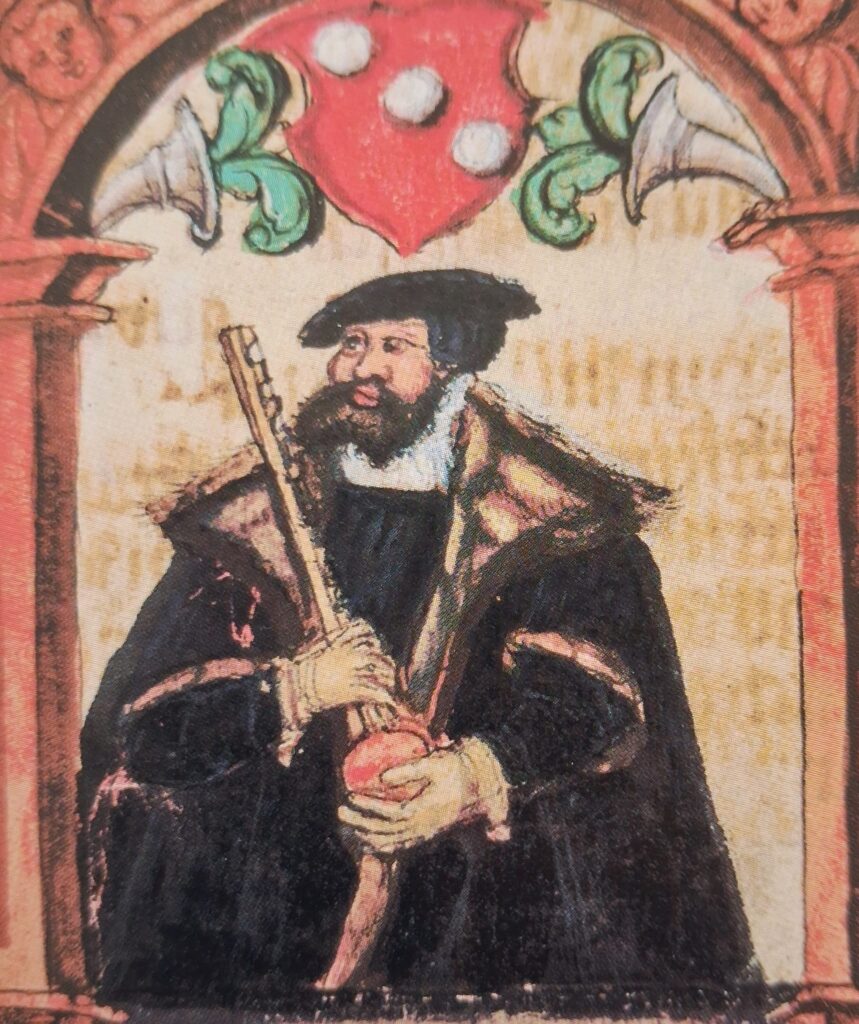
HASELBACH, Pankraz engelhard von. Chebská kronika
A photo from an illuminated manuscript is also included in the publication Clothing in Western Bohemia in the 15th to 17th Centuries by Veronika Pilná (p. 251) and depicts an older man—the primate of the city of Cheb—wearing a simple black bonnet set at a slight angle. Veronika Pilná also mentions in her publication knitted bonnets from the 16th century found in London and made using the circular knitting technique with multiple needles. It is not known to what extent this technique was used for bonnets in Bohemia, but it was used here as such (p. 51).
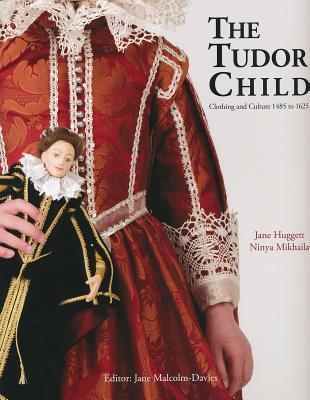
The pattern comes from my favorite publication, The Tudor Child: Clothing and Culture 1485 to 1625. It is very simple and can also be used for adults. It is suitable for the period 1485-1580 for all social classes and for the lowest class until 1625. According to Veronika Pilná, this type of bonnet was geographically very widespread - it was worn not only in Western Europe, but also in Central and Southern Europe (Clothing in Western Bohemia in the 15th to 17th centuries, p. 51).
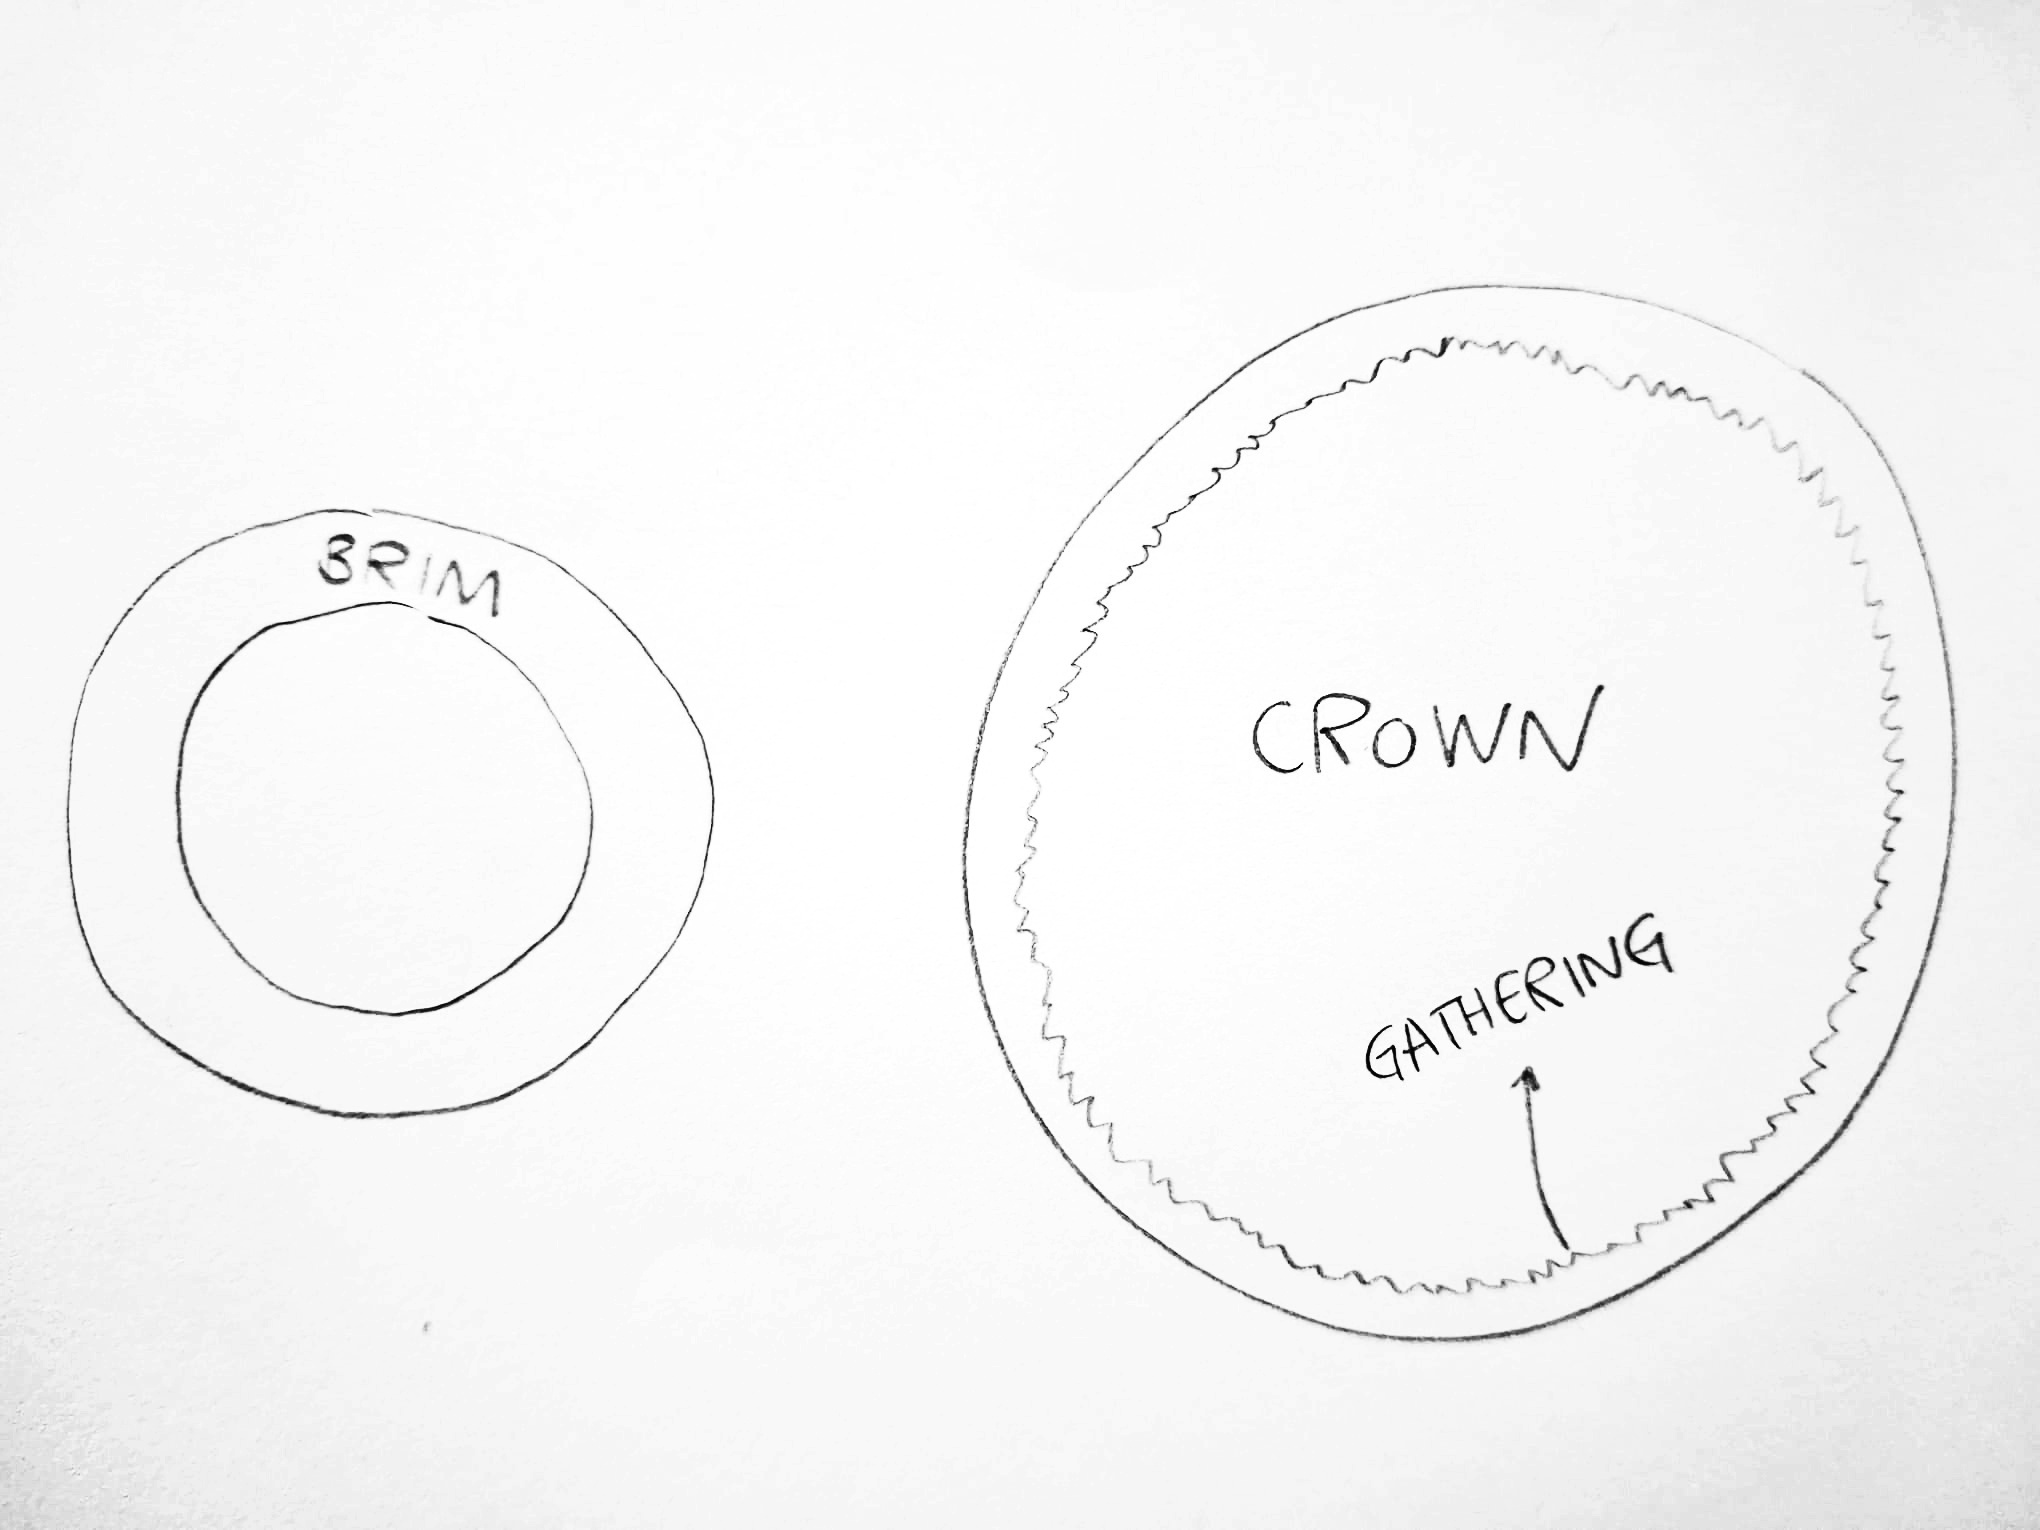
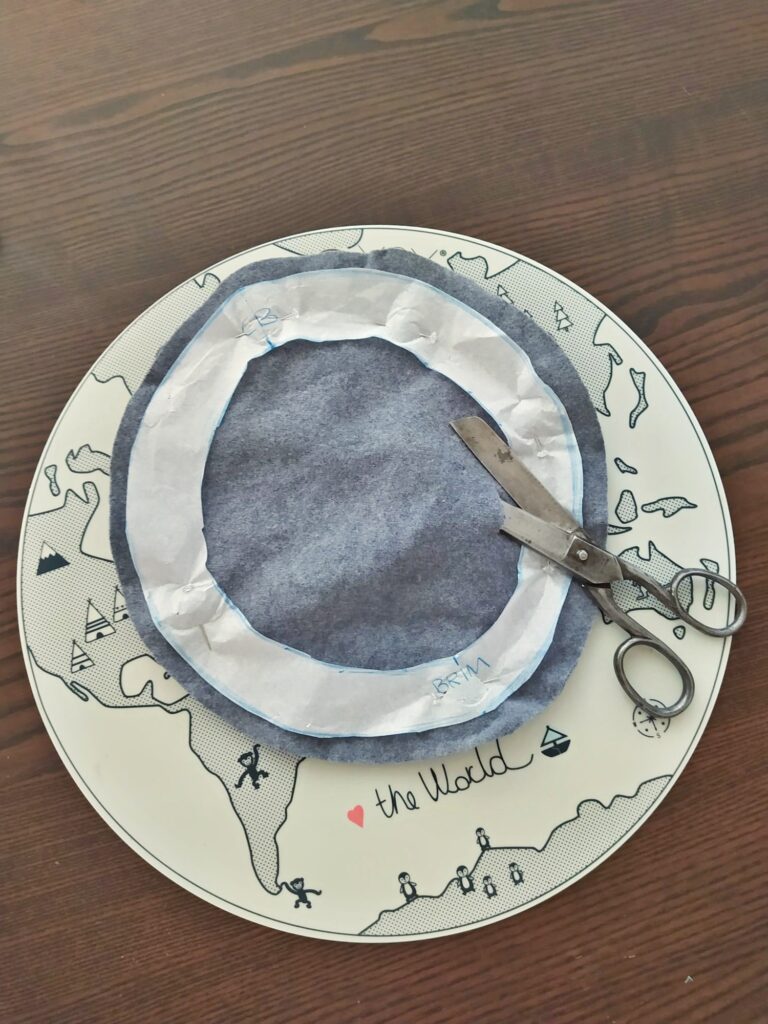
The basis of the pattern is the lower and upper parts of the bonnet: a simple circle forming the top of the bonnet / crown and the edge to which this circle is sewn - the brim of the bonnet. Add 12 mm of fabric for seams to both pieces.
I chose warm gray and very comfortable wool. The reason for this was to recycle an old medieval hood that was no longer being used, as well as the properties of the fabric—warm wool in a nice color.
The pattern in the book specifies the size of the bonnet for a 10 year old child with a head circumference of 56,5 cm. The pattern can be easily adjusted to the size of the wearer's head by increasing or decreasing the circumference of the brim of the bonnet, i.e. by adjusting its inner and outer circumference. According to the publication, an additional 6 mm of length should be added to the corresponding size.
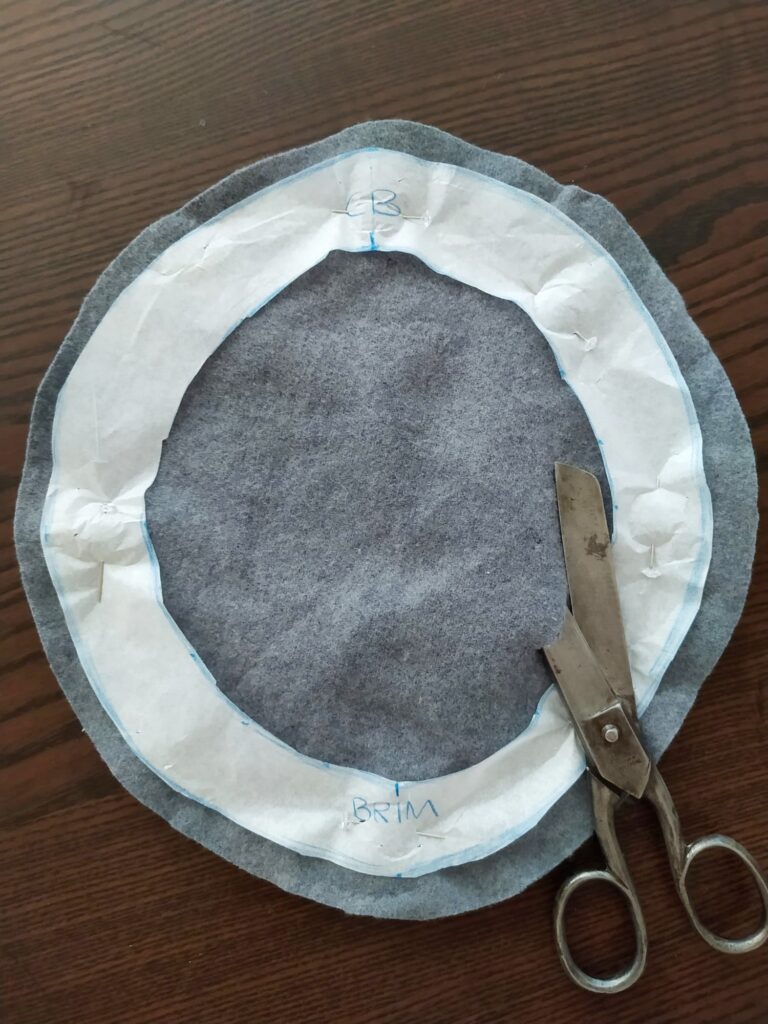
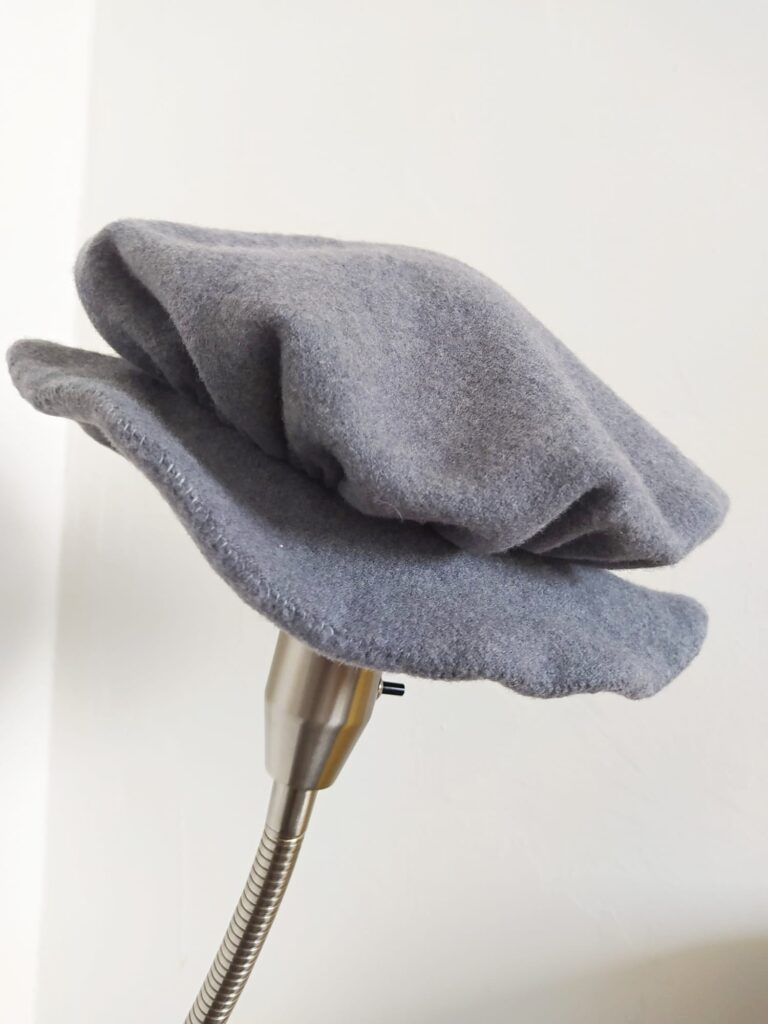
For a simple wool bonnet like the one I made, you need to cut out two layers of brim. For those who would like a slightly better version of the bonnet, you can sew wire into the edge, which allows you to shape the bonnet in various ways when wearing it. I thought this option was unnecessary for children, so I sewed a simple brim without wire, which works very well.

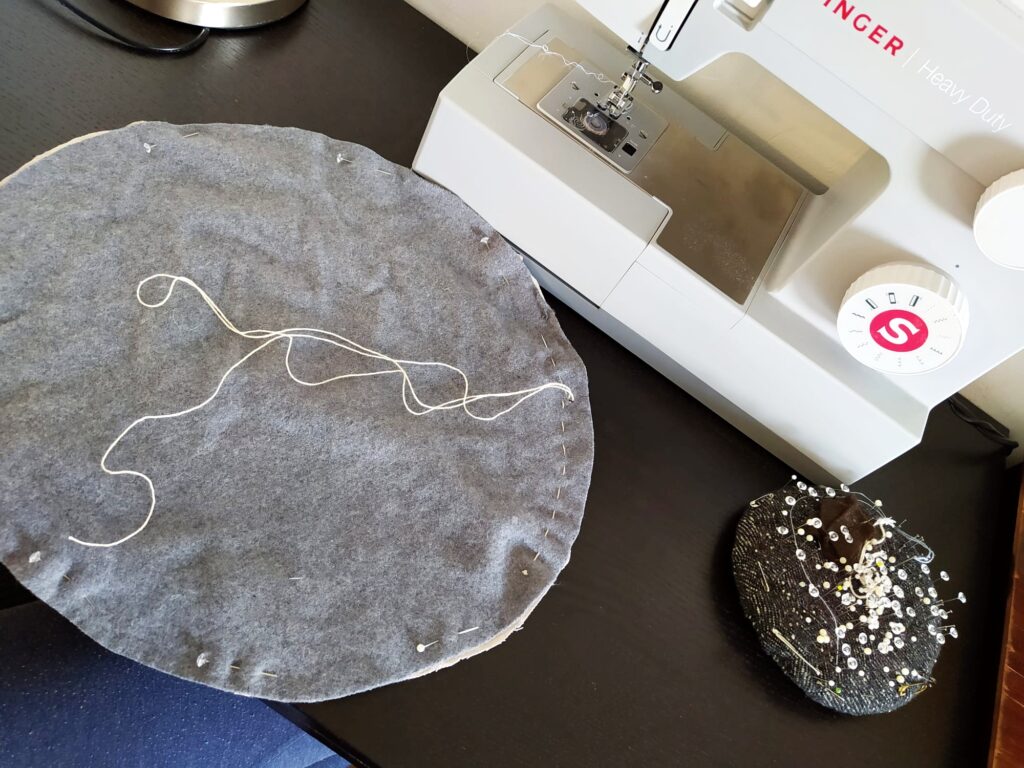
I sewed two basic layers of brim on the outside hem —this hem is visible from behind the crown when worn.
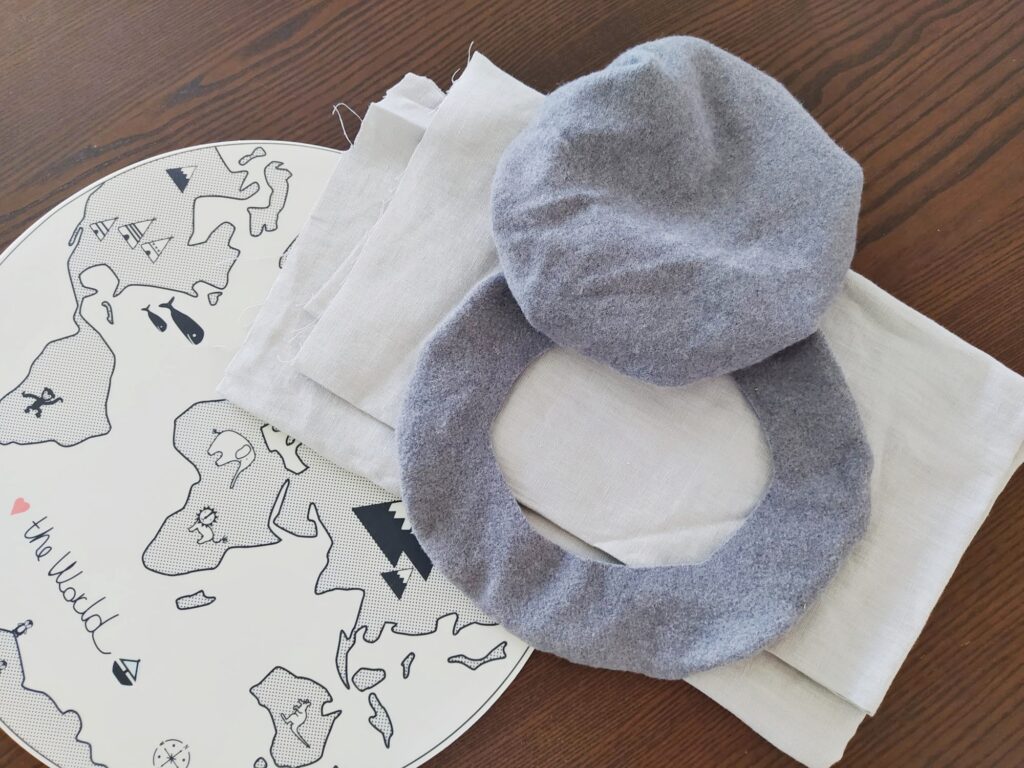
In addition to warm outer fabric, it is also good to use lining for the bonnet – I chose light-colored linen. Its size is equal to the size of the upper part (crown of the bonnet).
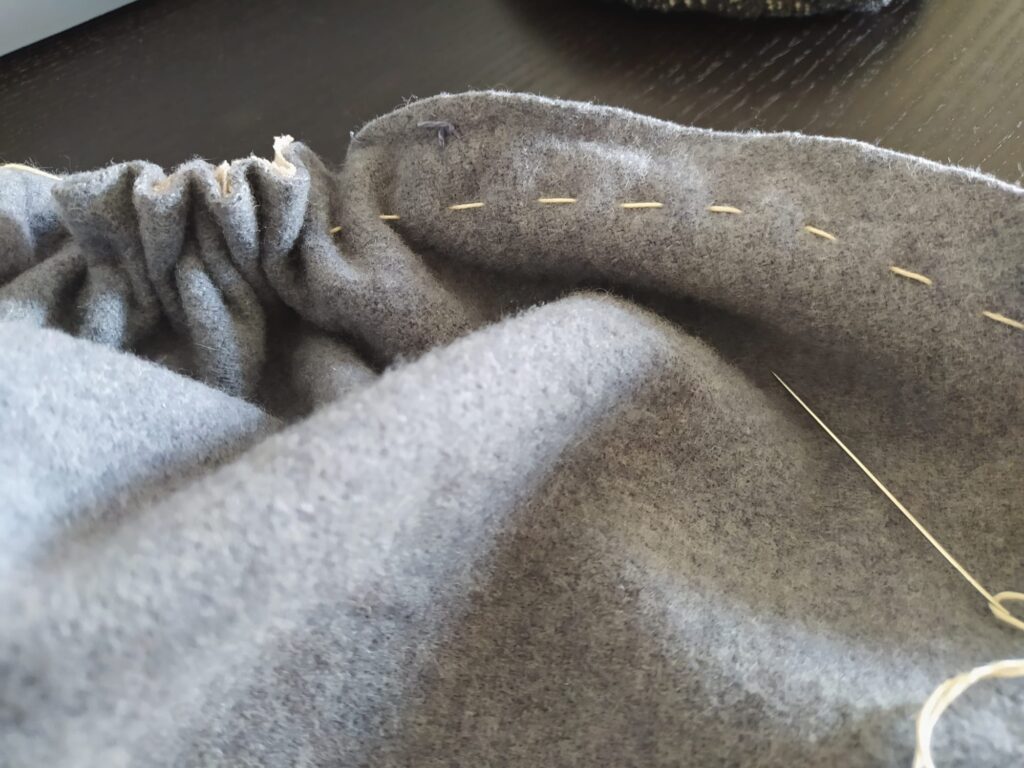
I placed both circles—the woolen crown of the bonnet and the linen lining—together and gathered them with thick thread. The circumference of the gathering must correspond to the inner circumference of the brim. I first gathered the bonnet with thick cotton thread to set the appropriate volume and then sewed it with a denser stitch. Then I attached the gathered fabric to the brim.
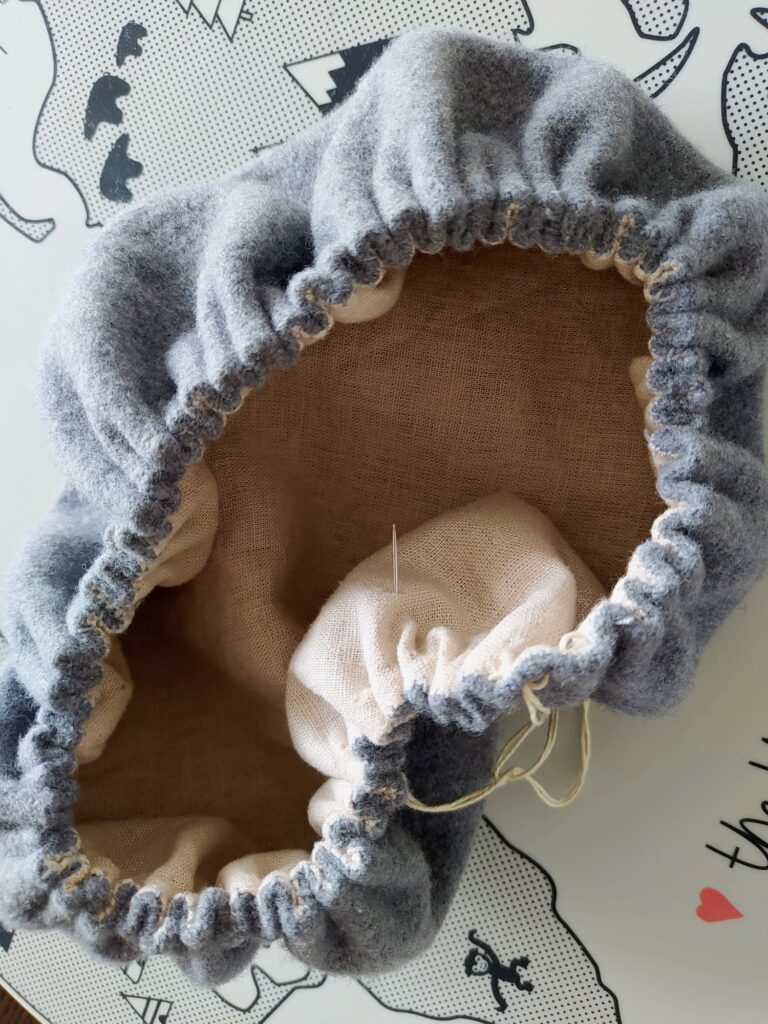
After gathering and sewing it with a dense stitch, I removed the original cotton cord from the bonnet, which was only used to make gathering easier, not as a permanent stitch.
This creates a gathered and lined bonnet crown and brim, which is sewn along the outer edge. The gathered crown must be sewn to the inner circumference of the brim at the gathering point.
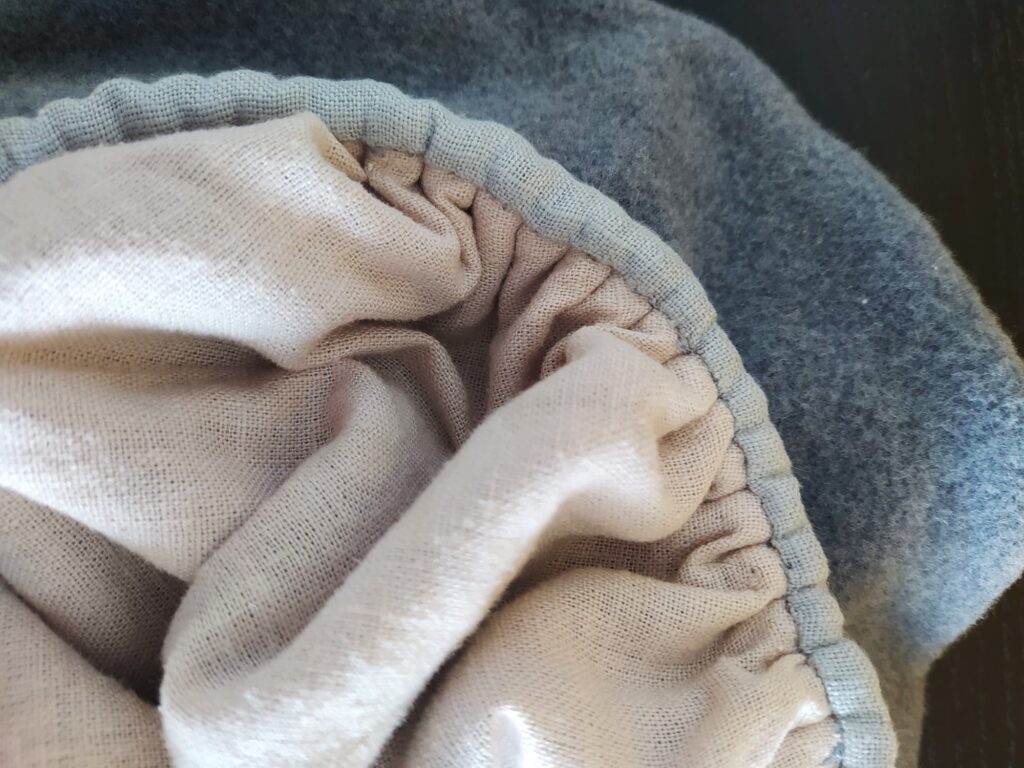
After joining the upper and lower parts of the bonnet, it is necessary to attach a strip of lining to the gathered crown (as a kind of finish to the rough join between the two parts) – I used light gray linen. The strip of fabric should be 2,5 cm wide and the same length as the circumference of the gathered edge/inner brim (just add a little extra to the length).
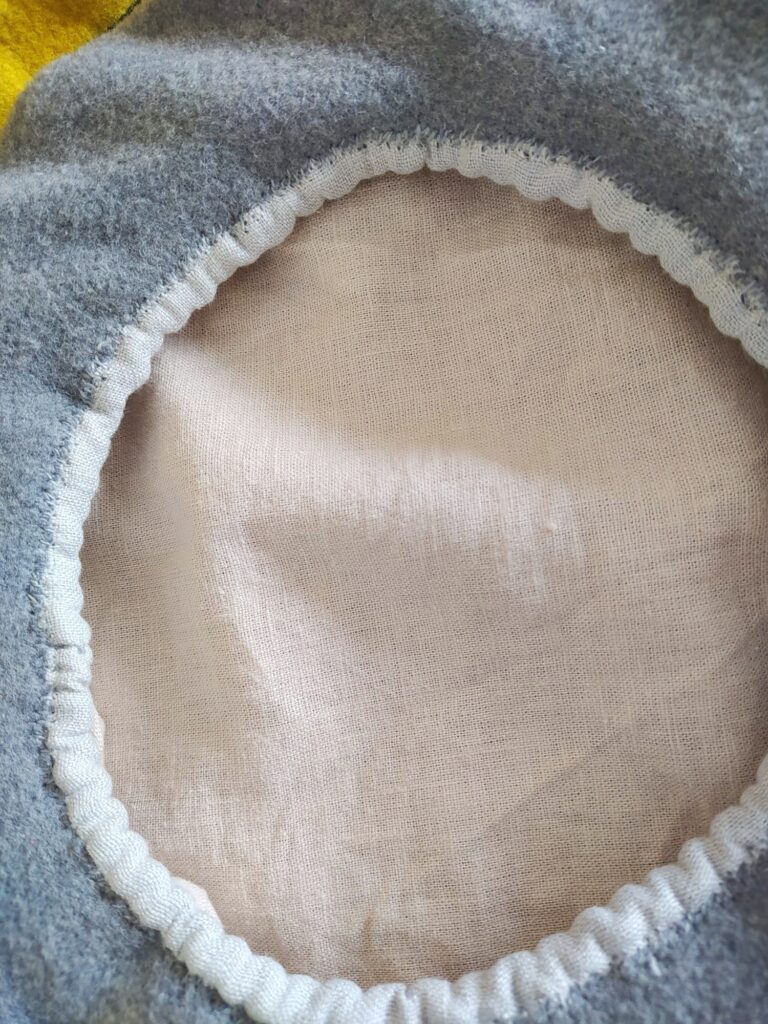
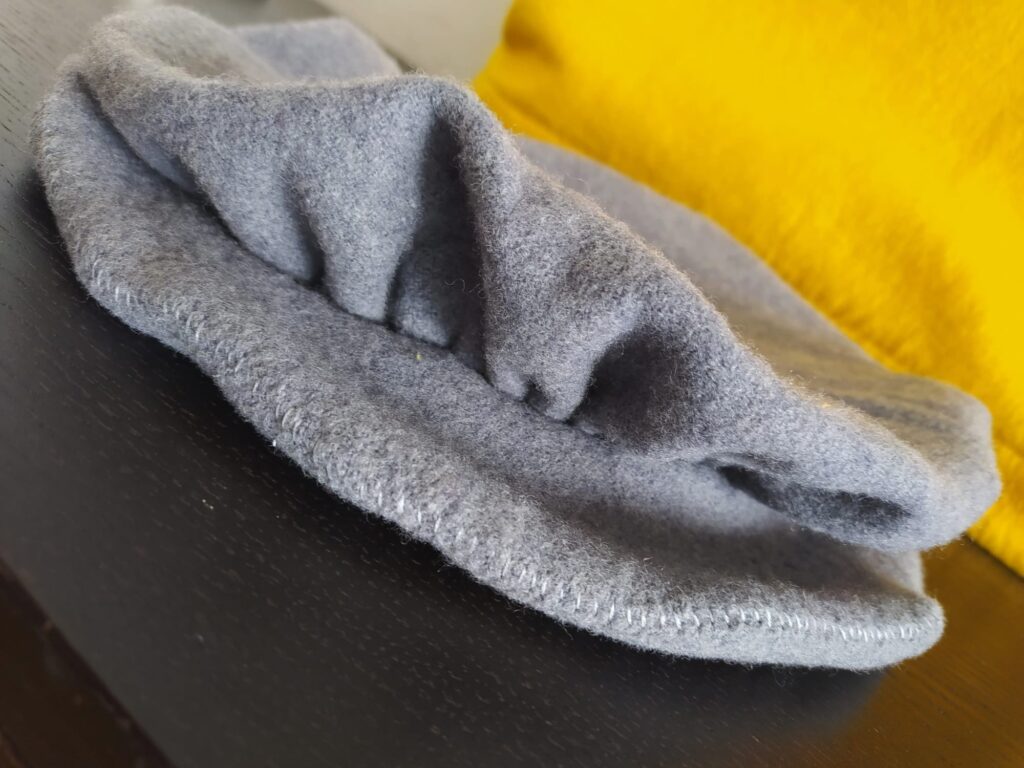
The inside of the bonnet after all the parts have been joined together.
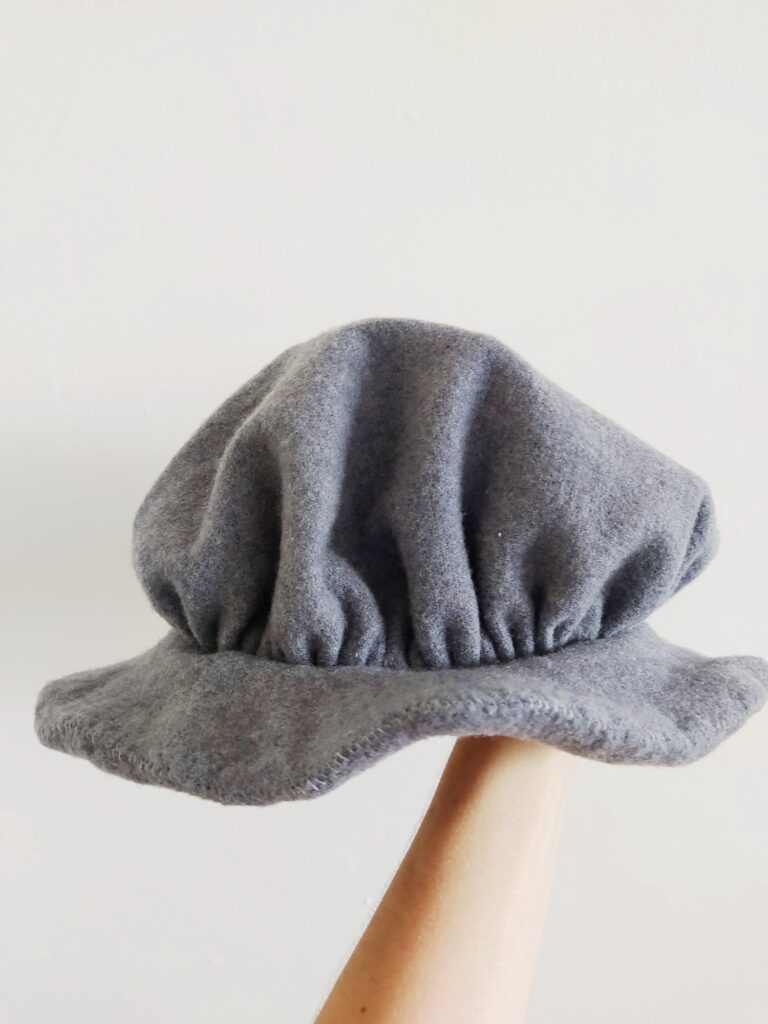
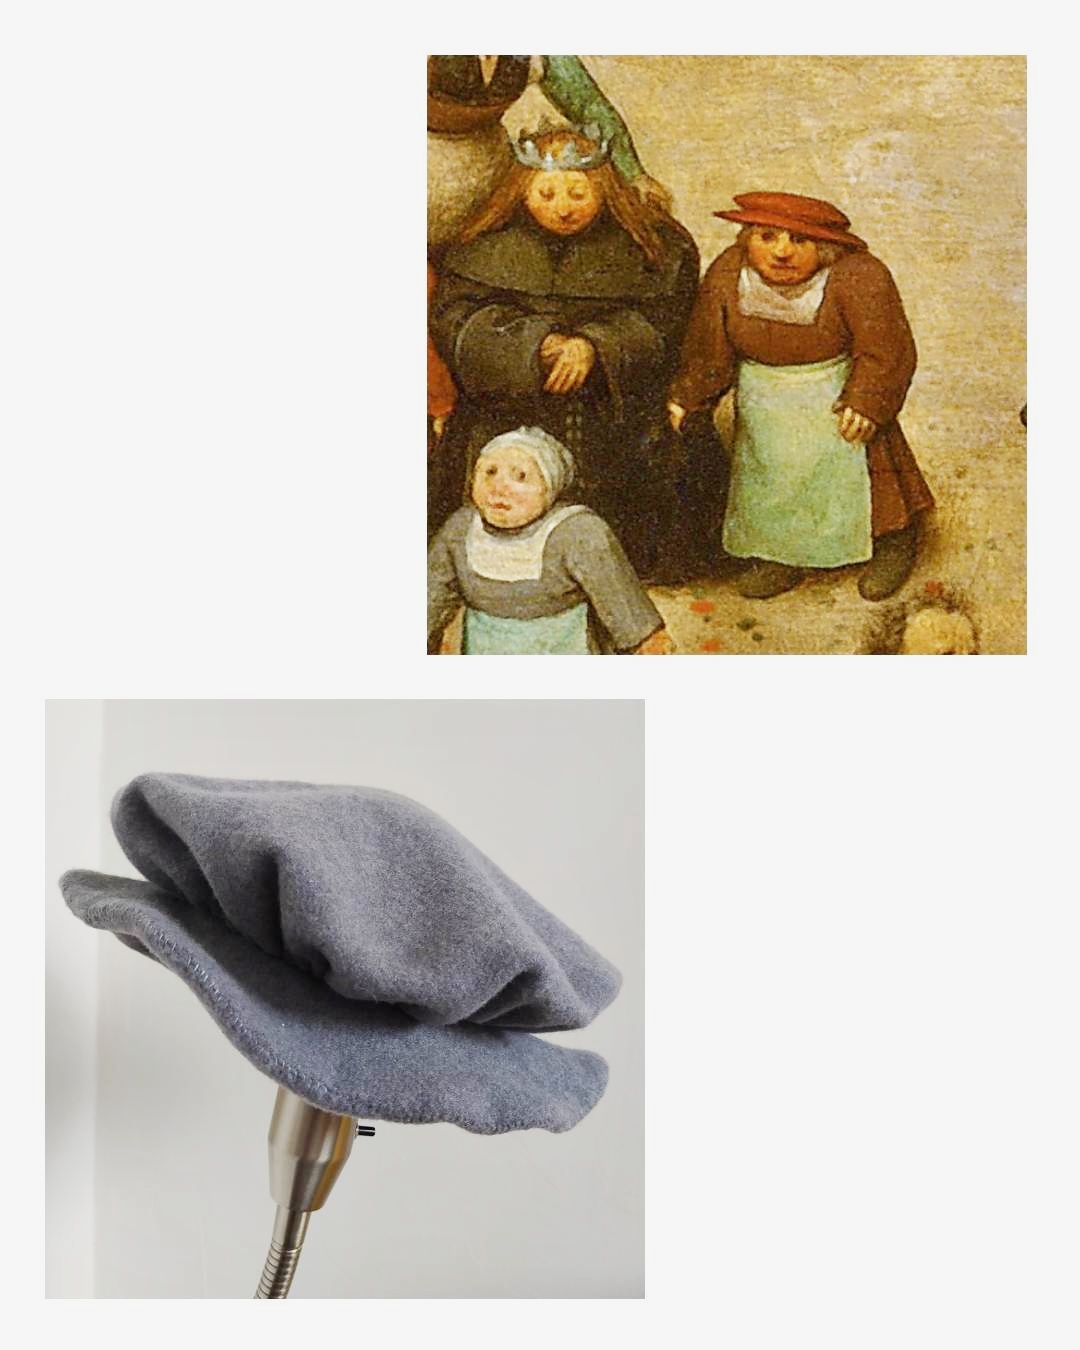
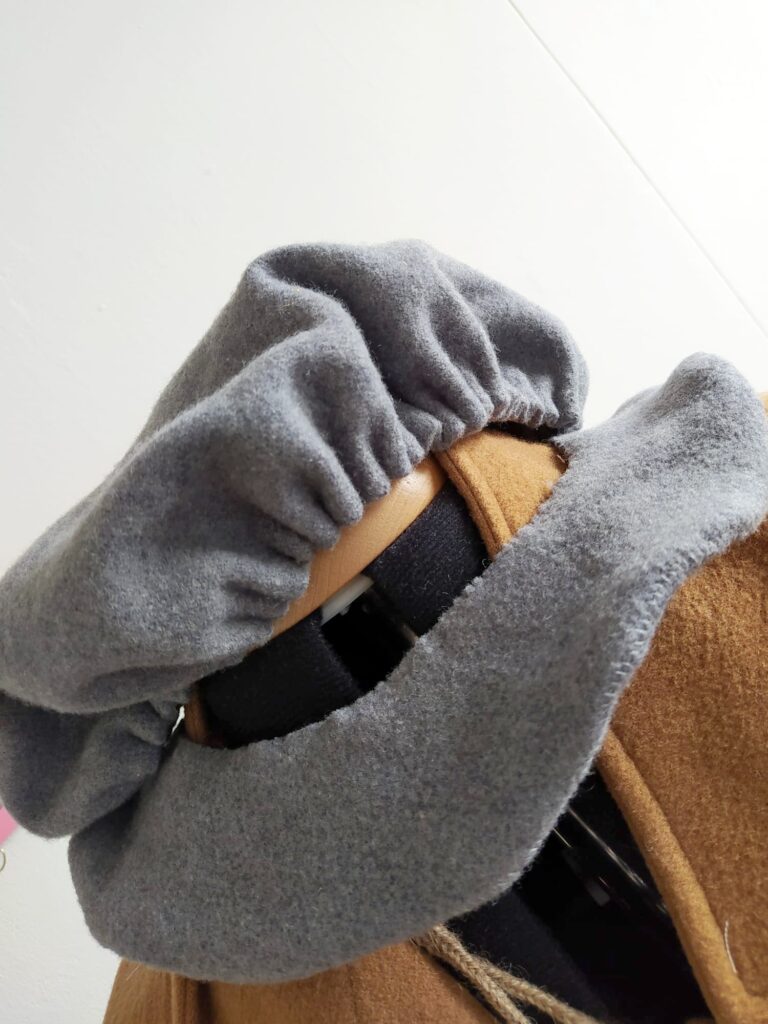
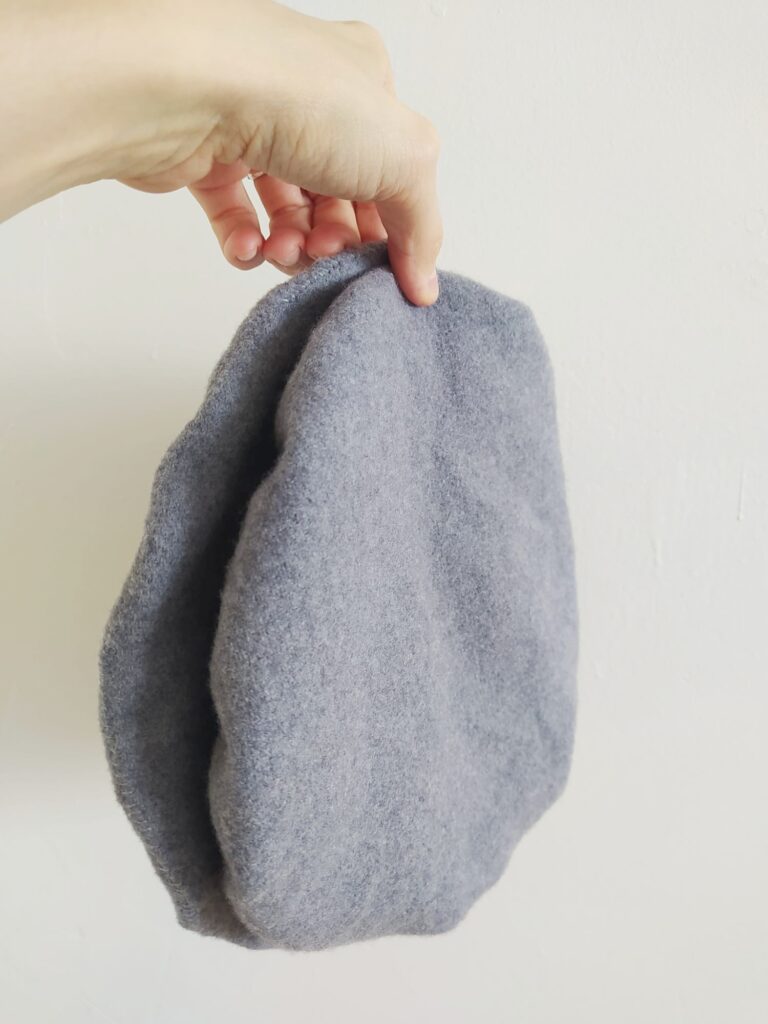
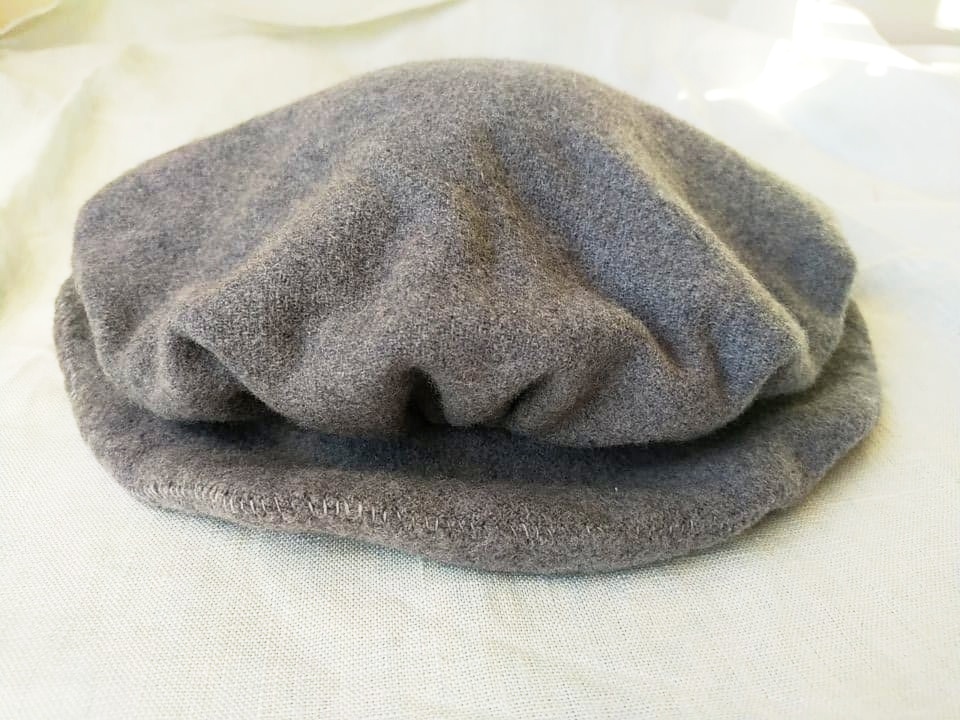
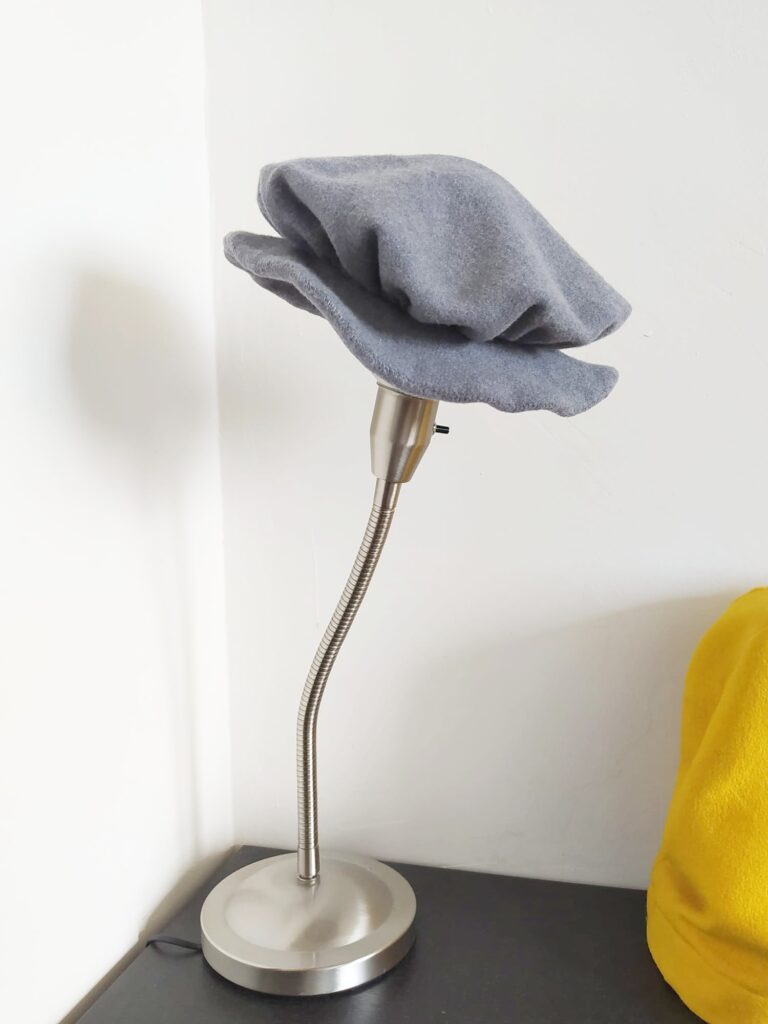
The finished bonnet.
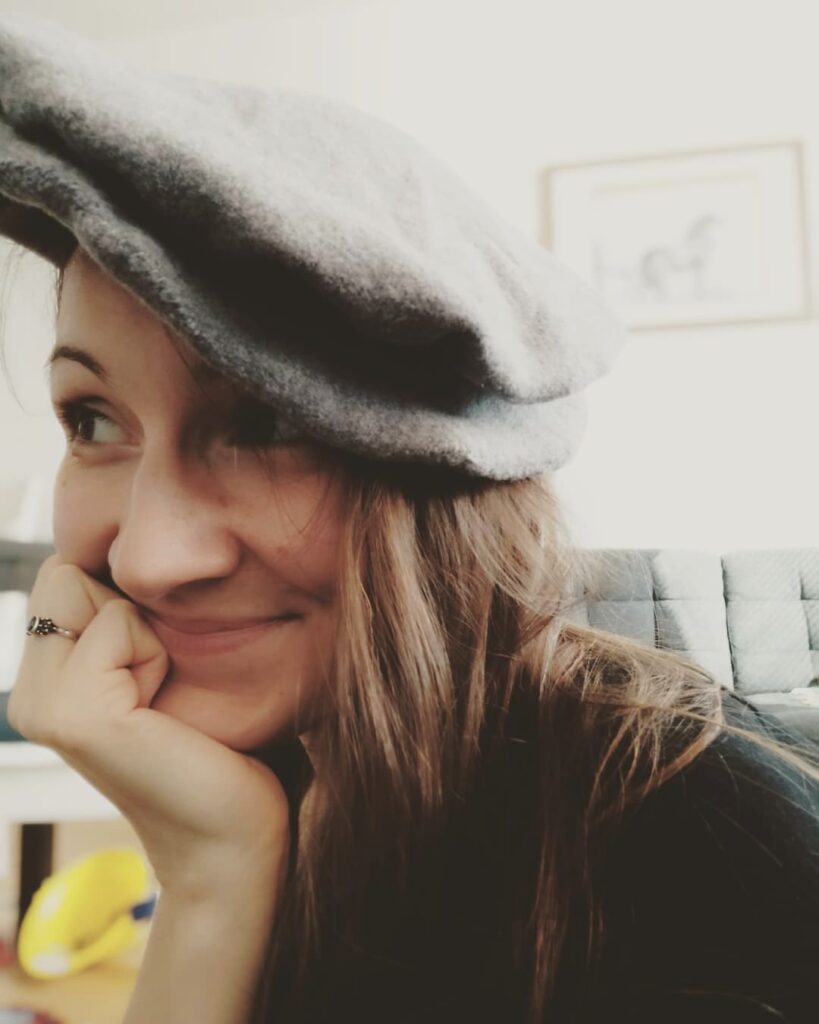
I must admit that I have grown very fond of the bonnet myself.

Bonnet in the rain at the historical event "Soldiers in the Village" at the open-air museum in Vysoký Chlumec.